
There’s something heartwarming about making bread from scratch — the smell, the texture, and the first warm bite are pure magic. If you’re looking to try a traditional bread recipe that’s both easy and delicious, this Authentic Reka Bread Recipe is exactly what you need.
Today, we’ll guide you through how to make soft, fluffy homemade Reka bread step-by-step, using simple bread ingredients and traditional baking techniques.
Let’s dive right in!
What Is Reka Bread?
Reka Bread is a beloved traditional bread known for its soft crumb, golden crust, and simple, wholesome ingredients. It has a rich history in European baking culture and is loved for its rustic yet tender texture. Unlike many modern breads, Reka bread sticks to old-fashioned methods that produce a truly authentic homemade bread experience.
Ingredients You’ll Need for Authentic Reka Bread
To prepare this traditional bread recipe, gather these simple ingredients:
- 4 cups bread flour (plus extra for kneading)
- 2 teaspoons active dry yeast
- 1 ½ cups warm water (about 110°F / 45°C)
- 2 tablespoons olive oil
- 1 teaspoon sugar
- 1 ½ teaspoons salt
These basic ingredients come together to form the perfect dough that will proof beautifully and bake into soft, golden perfection.
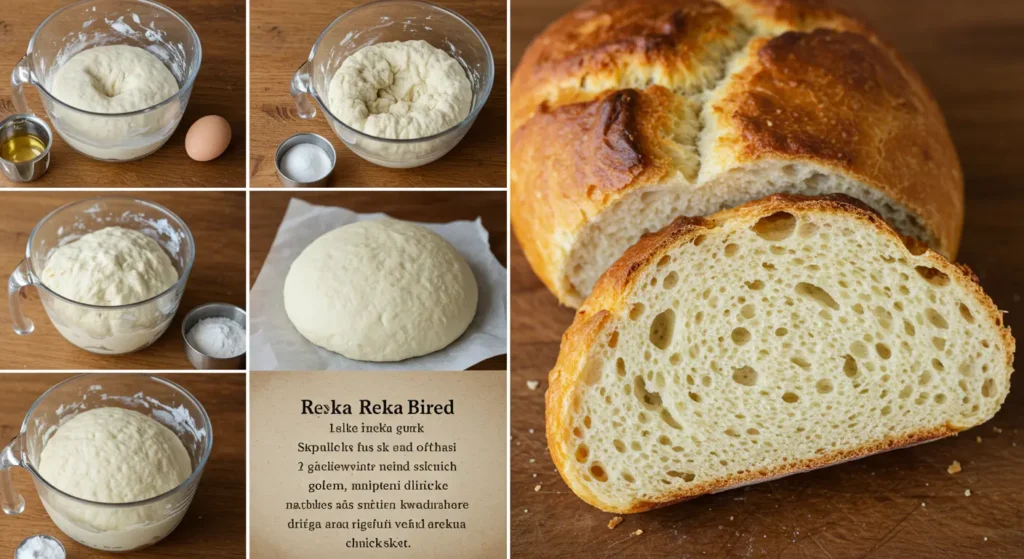
Step-by-Step Instructions: How to Make Homemade Reka Bread
Follow these easy steps to master the art of baking Reka bread at home:
1. Activate the Yeast
- In a small bowl, dissolve the sugar into the warm water.
- Sprinkle the active dry yeast over the water.
- Let it sit for about 5–10 minutes until it becomes frothy.
Tip: If your yeast doesn’t foam, the water may have been too hot or the yeast could be expired.
2. Mix the Dough
- In a large mixing bowl, combine the bread flour and salt.
- Make a well in the center and pour in the yeast mixture and olive oil.
- Stir with a wooden spoon until the dough begins to come together.
3. Knead the Dough
- Turn the dough onto a lightly floured surface.
- Knead for 8–10 minutes, or until the dough is smooth and elastic.
- Add small amounts of flour if the dough is sticky, but be careful not to over-flour.
4. First Proofing
- Place the kneaded dough in a lightly oiled bowl.
- Cover with a clean cloth or plastic wrap.
- Let it rise in a warm place for 1–1.5 hours, or until doubled in size.
5. Shape the Dough
- Punch down the dough to release air bubbles.
- Shape into a round or oval loaf, depending on your preference.
6. Second Proofing
- Place the shaped dough onto a baking sheet lined with parchment paper.
- Cover loosely and let it rise for another 30–40 minutes.
If you enjoy baking traditional breads, you’ll also love my Buttery Homemade Gipfeli
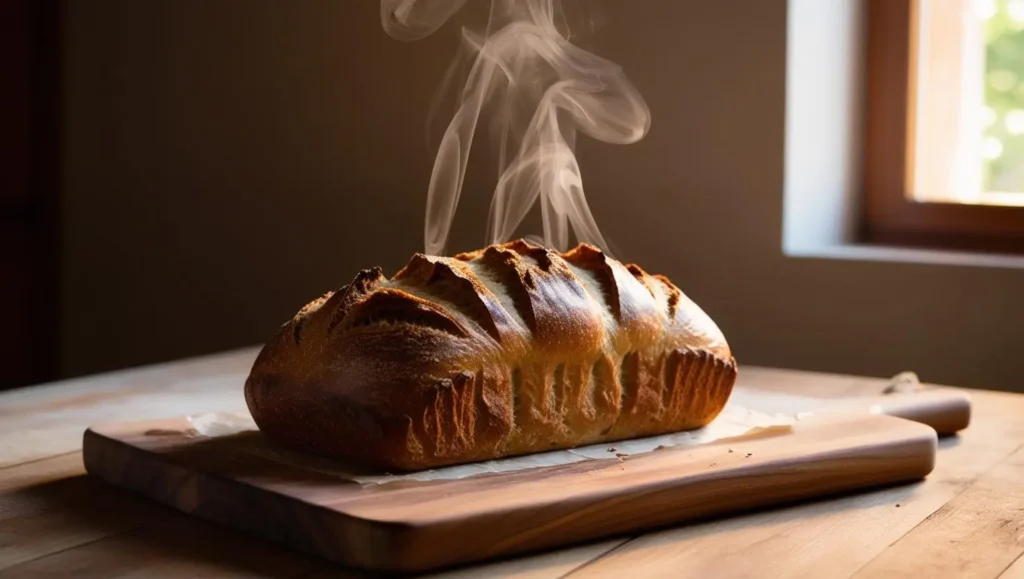
Reka Bread Recipe: Baking to Golden Perfection
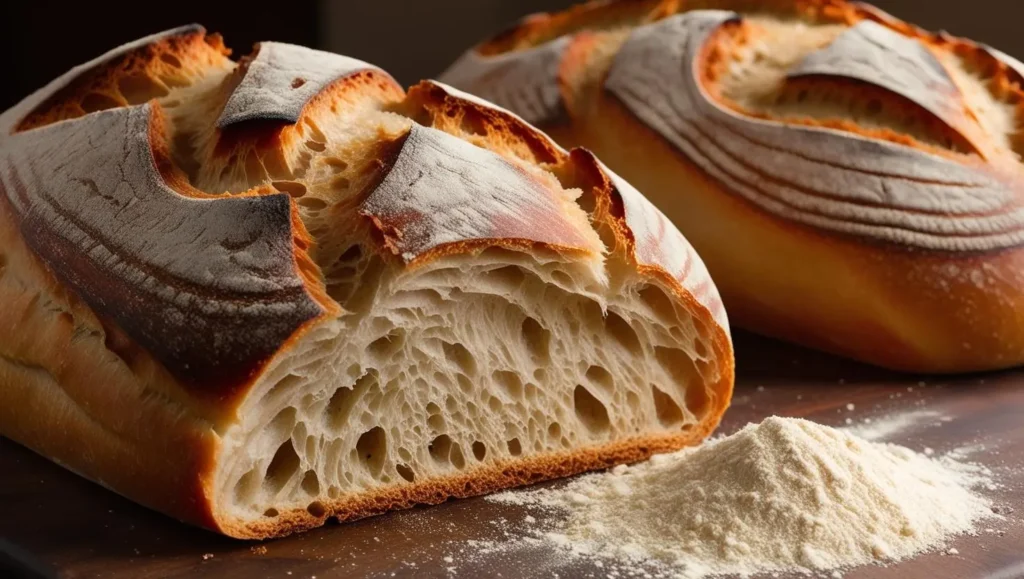
Now comes the best part — baking!
- Preheat your oven to 425°F (220°C) during the second proofing.
- Make a few shallow slashes on top of the dough with a sharp knife (this helps the bread expand beautifully while baking).
- Bake for 25–30 minutes, or until the crust is golden brown and the loaf sounds hollow when tapped on the bottom.
Tip: For an even crustier exterior, place a small oven-safe dish of water on the bottom rack of your oven while baking to create steam.
Reka Bread Recipe: Tips for Storing and Serving
Freshly baked Reka bread is best enjoyed warm with a dab of butter or your favorite spread. If you have leftovers:
- Store at room temperature in a bread bag or wrapped in a clean towel for up to 3 days.
- For longer storage, slice and freeze it. Reheat in the oven or toaster for a just-baked taste.
Learn more about proofing yeast for perfect bread every time.
Why You’ll Love Making Traditional Reka Bread at Home
Baking traditional Reka bread is about more than just following a recipe — it’s about connecting with timeless baking traditions. The soft and fluffy bread, the simple ingredients, and the unbeatable fresh-baked smell create a rewarding kitchen experience you’ll want to repeat again and again.
Whether you’re a beginner or a seasoned baker, this easy Reka bread recipe is guaranteed to bring golden, delicious results.
hi